
6 minutes to read
Basic usage of JUnit Framework in Selenium Script - Junit tutorial for beginners


Chief Executive Officer
Share
While learning selenium testing tools was found the JUnit framework. It is a library for unit testing of Java software. It is mainly used for unit testing Java projects Java projects, however, it can be used with Selenium WebDriver to automate testing of web applications.
Let's consider the advantages of JUnit framework in our junit testing tutorial:
In this junit tutorial for beginners will be shown you how you can automate testing for your program, using this method you can check the program's performance after any changes to its source code, to make sure that your change has not destroyed the logic of the program.
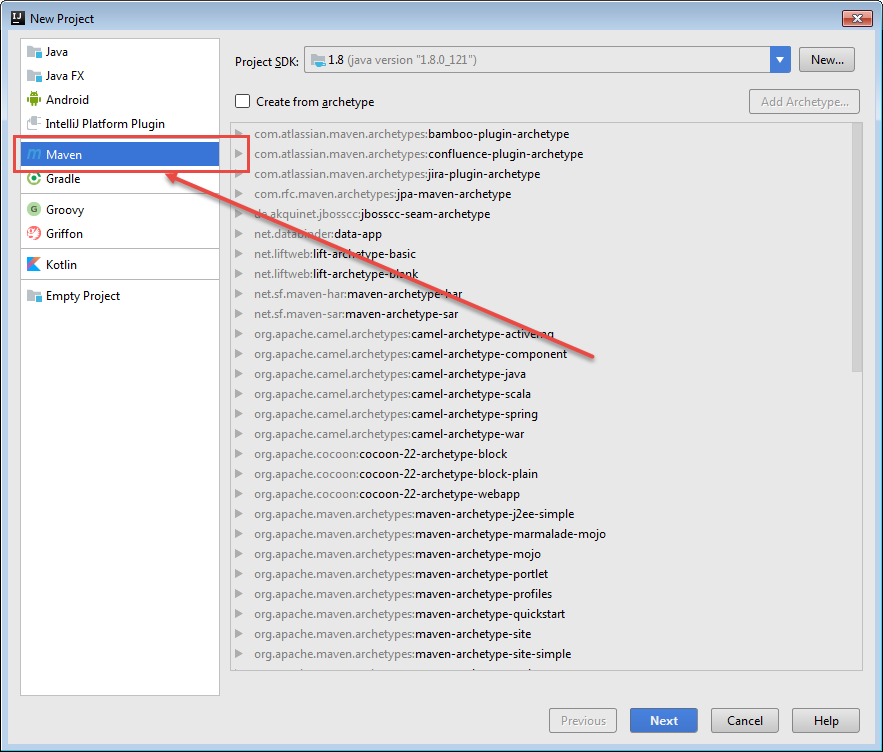
Step 1. Create the Maven Project in Intellij IDEA
After this - enable auto import.

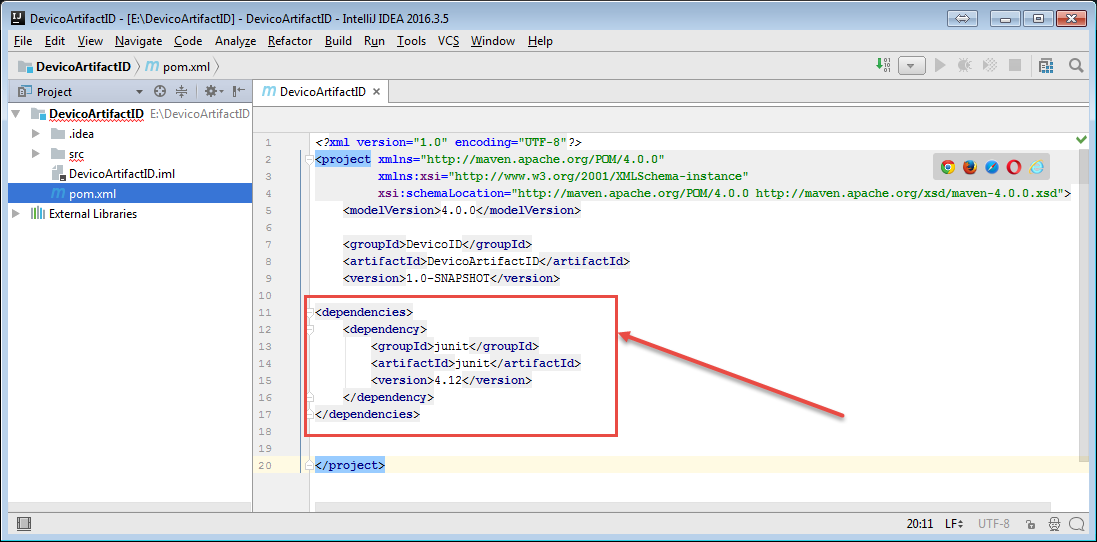
Step 2. To start we need to connect the JUnit dependency in pom.xml, we do not forget that for convenience we use Maven
At the time of writing, the newest version of JUnit 4.12. After we added JUnit as a dependency:
After, we can work with it.
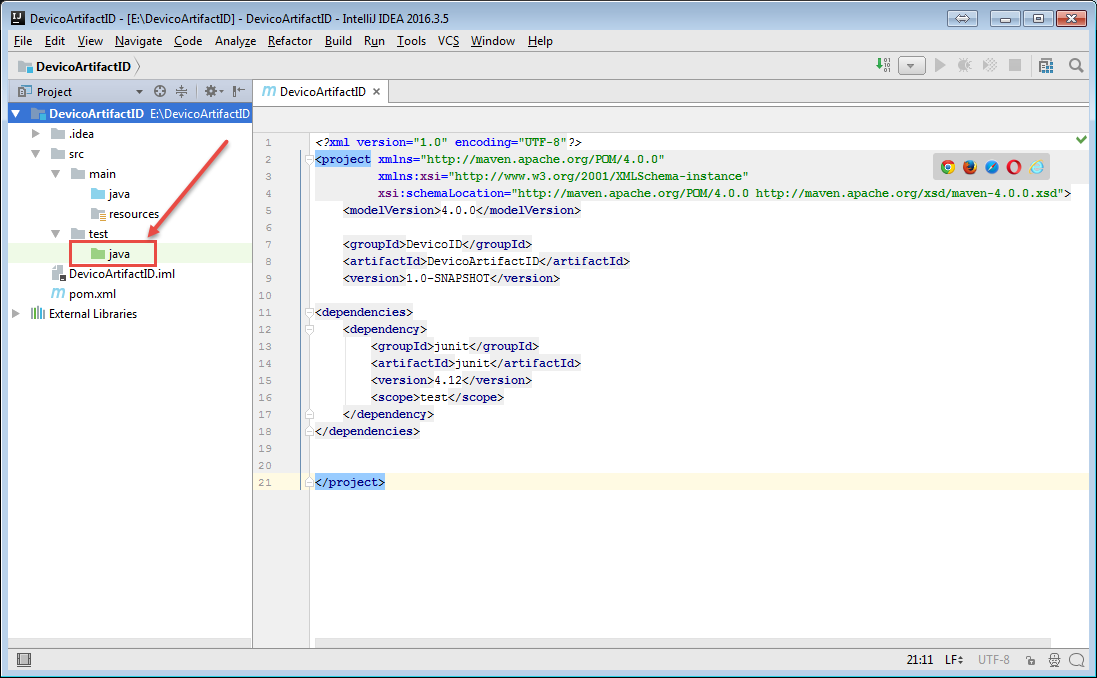
Be sure to check that the folder that lies in the test / java is green, this means that there are test classes in this folder and they will not be picked to the project when assembling the project.
If it's not green then go to Project Structure (Ctrl + Alt + Shift + S) then select Modules-> Sources from the left and specify that the test / java folder will be a test resource. The example is shown in the picture below. 
Step 3. Suppose we have a class in which there is a method that performs some actions, for instance, sums up some numbers, this will be our logic that needs to be tested

1) You do not know what manipulations the class methods do, you just see the method and know what it returns, also you know what it does, but you do not know how, and also you know what data is required for this method.
A test engineer just see:

2) You should fill in all possible data into this method and try to make it so that the test fails.
Step 4. The unit test from the technical side is the class that lies in the test resource and which is intended only for testing the logic, and not for use in production code
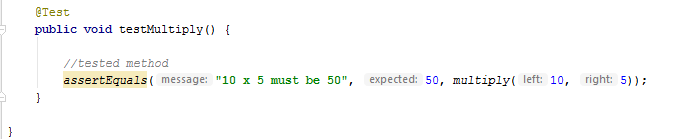
Example of JUnit test:
Important!
In JUnit assumes that all test methods can be executed in arbitrary order. Therefore, the tests should not depend on the other tests.
To indicate that this method is the test it needs to annotate **@Test** after which this method can be run in a separate thread for executing a test.
Below is an overview of available annotations in JUnit 4.x.
**@Test** Public void method
The annotation **@Test** determines that method () is a test method.
**@Before** Public void method
The annotation **@Before indicates that the method will be executed before each test method @Test**.
**@After** Public void method
The annotation **@After indicates that the method will be executed after each test method @Test**.
**@BeforeClass** Public static void method
The annotation **@BeforeClass** indicates that the method will be executed at the beginning of all tests, and more precisely at the time of the test run (before all **@Test** tests).
**@AfterClass** Public static void method
The annotation **@AfterClass** indicates that the method will be executed after all tests.
**@Ignore**
The annotation **@Ignore** says that the method will be ignored at the time of testing.
**@Test** (expected = Exception.class)
(expected = Exception.class) - indicates that in this test method you purposely expect Exception.
**@Test** (timeout = 100)
(timeout = 100) - indicates that the test method should not take more than 100 milliseconds.
Test methods (basic)
Fail (String) Indicates that the test method will fail and a text message is displayed. AssertTrue (message, boolean condition) Checks that the logical condition is true. AssertEquals (String message, expected, actual) checks that the two values match. Note: for arrays - links are checked , not content of arrays. AssertNull (message, object) checks that the object is null. AssertNotNull (message, object) checks that the object is not null. AssertSame (String, expected, actual) checks that both variables refer to the same object. AssertNotSame (String, expected, actual) checks that both variables refer to different objects.
Now let's find out in our Junit test tutorial how we can write our Selenium tests in Junit?
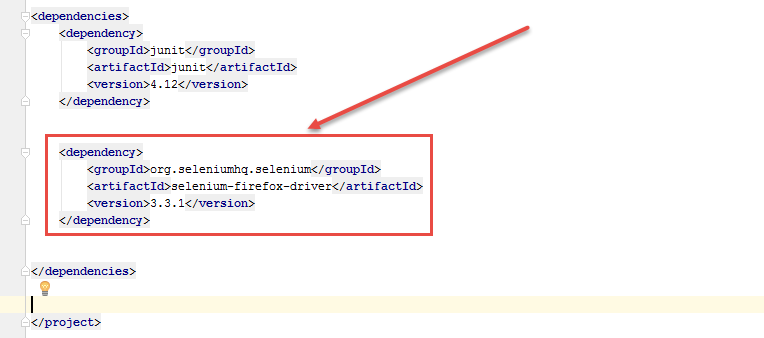
We need to import selenium. For this - add such dependency into pom.xml file:
Let's consider it block by block the example
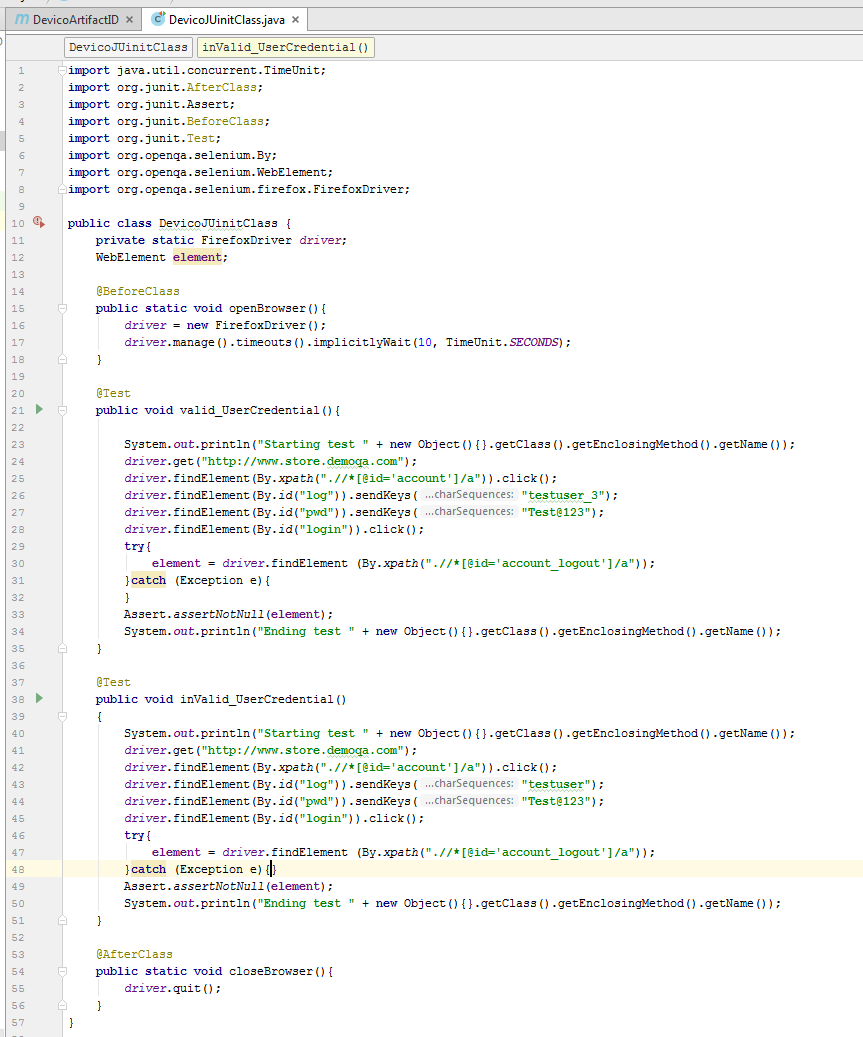
1) Before Class Annotation
As described above, the code under the annotation @before is executed before tests and in this example it is used for starting the browser. This is convenient if you have several tests, thus launching the browser is executed once.
2) Test Method
This is a simple test of Log In functionality of our Demo application. But what you can notice in it is try/catch block & assert statement. This try block is to test the presence of the element, if it does not find it the element will remain as null. With that assert statement will verify that the element is not null.
3) After Class Annotation
This is to tell Junit engine that executes this piece of code once all the test has been executed. This will finally close the browser down, as after this no test would be needed any browser to execute any steps.
Share