Is your web app ready to deliver a great user experience across all platforms, devices, and operating systems?
There are about 15 different testing approaches to choose from. Each one has its objectives, benefits, and drawbacks. While most of them focus on testing isolated elements of the software, only few take care of the entire product lifecycle.
This is precisely what end-to-end testing aims to achieve in web development. It goes through every stage and simulates each user's action to make sure there are no bugs or issues before the product is launched.
As web apps evolve, they become more complex and dynamic. They get new features and updates. In such a case, to maintain the same or even better user experience, it is crucial to test every aspect before the software “hits the shelves.”
Different end-to-end testing tools and frameworks can help achieve a great user experience across different platforms and devices. We have already done a guide on Cypress testing to help you start with the tool. Now, it is time for Playwright.
In this article, we will show what Playwright is and how to get started with Playwright testing. With the knowledge received, you will be able to use Playwright end-to-end testing with great benefit.
E2E testing 101. All you need to know
As we mentioned before, web apps offering good user experience often come with a lot of moving parts. They need constant updates to adapt to the changing user needs. This makes the app increasingly complex. That is why testers need to keep up and make sure all the parts within a web app communicate and function as they should, from user interfaces to backend services. In such a case, E2E testing is what makes it happen.
What is end-to-end testing in the first place?
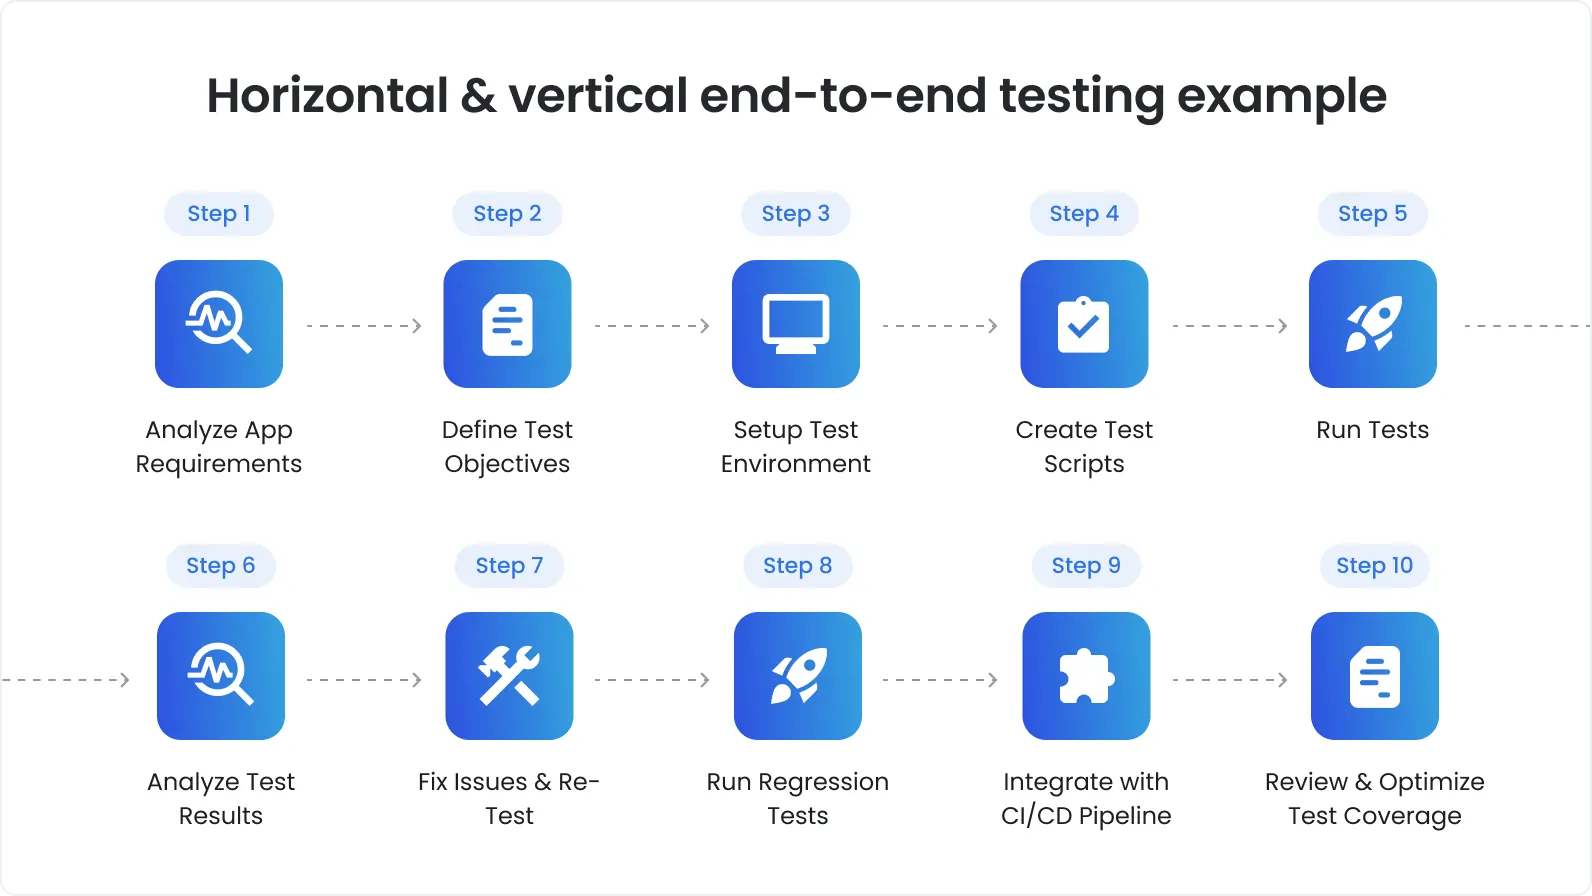
E2E testing validates the complete workflow of an application. Unlike unit testing or integration testing, the methodologies focus on isolated parts, and end-to-end testing simulates real-world user interactions to check if the whole system functions as intended. Every potential user action, from the moment a person logs in to the time they complete a transaction, every step is tested for reliability, accuracy, and consistency.

Examples of E2E testing usage
There are different aspects of what E2E testing covers. In most cases, these include the following four:
User authentication. The area includes testing all login- and logout-related processes. The key goal is to make sure users can access only authorized parts of the web app.
Form submission. E2E testing checks all the forms are properly processed and stored. Forms are the boxes on a web app where a user types in info, such as name, address, credit card number, etc.
Navigation flows. The area is all about testing how a user moves around an app. From clicking a button to tapping a link. E2E testing helps check that all these in-app actions are smooth and takes users exactly where they expect to go.
Dynamic content handling. E2E testing renders AJAX requests, WebSockets, and other asynchronous operations. The QA testers ensure every content-related change in the web app happens smoothly without harming the performance or user experience.
Naturally, to start with E2E testing, you need to have the right tool at your disposal. In the context of our article, we will speak about Playwright.
Why choose Playwright QA for E2E testing?
There are many E2E testing tools out there. You can choose from open-source, commercial, and niche ones. Here, we speak about Playwright.
Four key reasons to choose Playwright as a tool for E2E testing:
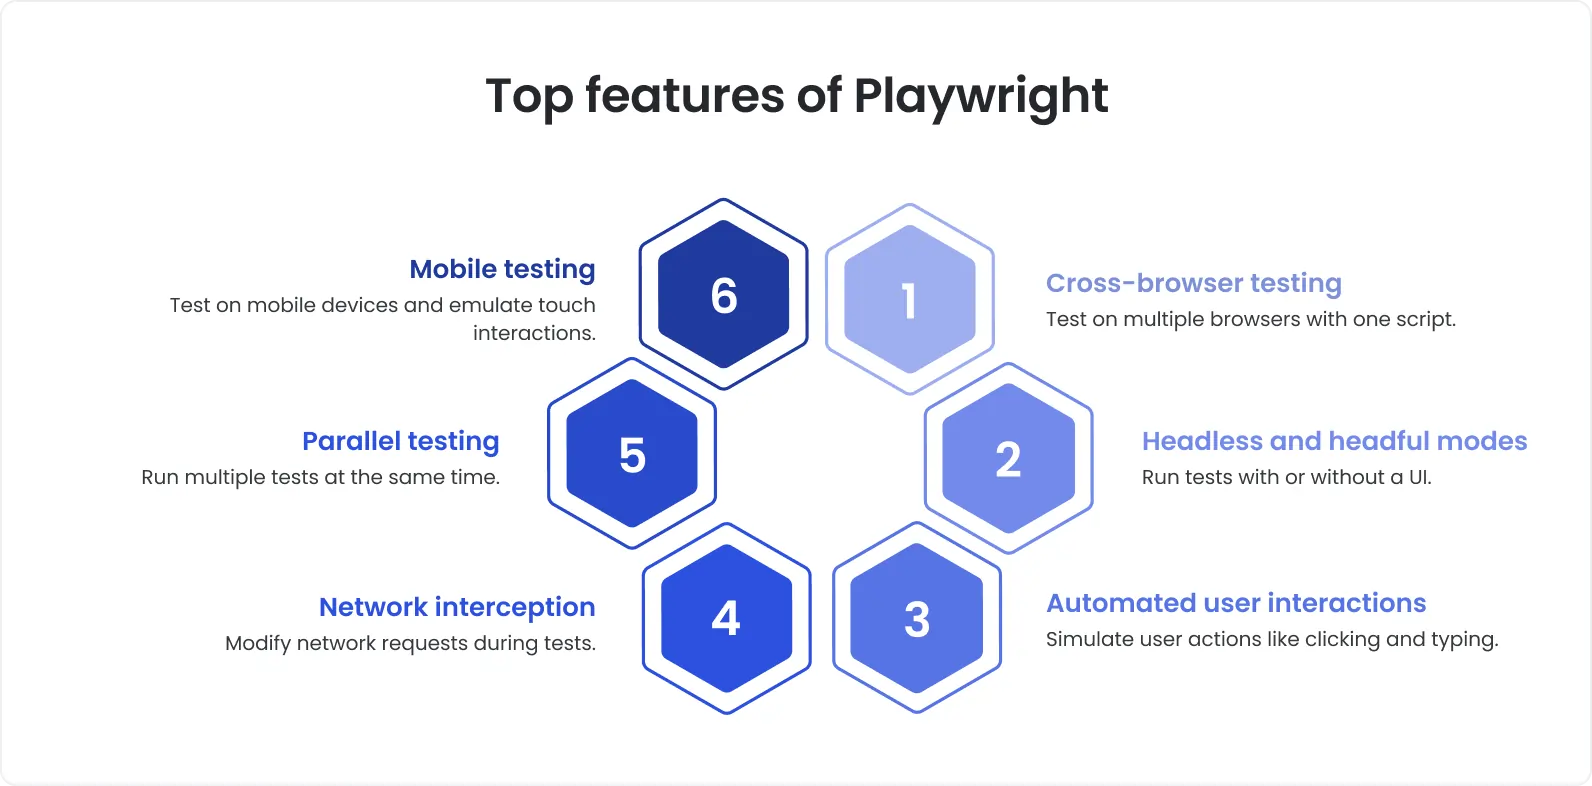
Headless and headed modes. Developers can run tests without a graphical interface. This means faster execution and a visible browser for debugging.
JavaScript framework integration. Playwright testing works with Jest, Mocha, and Jasmine. It is a good choice for JavaScript/TypeScript projects.
Fast execution. Playwright can control browsers at a low level. This helps execute tests at high speed.
Ease of use. The tool comes with a simple API and extensive documentation. Getting started with Playwright testing is straightforward, even for newcomers.
Playwright has quickly become among the top choices for SDET and QA engineers for easy-of-use and fast test execution.
6 key benefits Playwright offers for testing web apps
As with other open-source E2E testing instruments, a smooth user experience is a priority for the Playwright testing tool. When reaching such an objective, Playwright also offers these benefits:

Benefit #1. Automatic waiting for easy element handling
No more unpredictable test results. Playwright has an automatic waiting feature that, well, waits for different elements to be fully loaded before doing any actions like clicks and or inputs. As a result, testers get fewer frustrating test failures while most tests remain stable.
Benefit #2. Cross-browser testing without hiccups
Playwright allows E2E testing via Chrome, Safari, Edge, and Firefox with just one test suite. Besides, the tool supports Chromium and WebKit. In such a case, you can verify your web app’s performance across all major browsers.
Benefit #3. Single-Page Application (SPA) support
Playwright E2E is great for testing web apps and updating content dynamically, which means it does not require a full page reload. Works best with SPA and manages AJAX requests, WebSockets, and other dynamic elements to make sure built E2E tests are robust.
Benefit #4. True-to-life user interaction simulation
Playwright accurately replicates user actions, such as clicking, scrolling, and typing. You get more reliable tests, the ones mirroring user experiences with high precision.
Benefit #5. Complete control over network interception and mocking
With the Playwright testing framework, your E2E testing team has complete authority over an app’s network behavior. It means testers can intercept requests, craft mock responses, and simulate different challenges in E2E testing, such as slow connection or offline states, for the sake of testing how the app holds up in general.
Benefit #6. Spotting visual changes with visual regression testing
Compare screenshots to baseline images to detect unwanted UI changes and ensure your application’s appearance remains consistent.
Example use case where Playwright best practices come in handy:
First and foremost, imagine your web app as a dynamic dashboard powered by real-time data from WebSockets and API requests. While E2E tests will be processed, your team needs to verify these three aspects:
1. The dashboard displays updated data within a few seconds of an API call.
2. The user can interact with elements while data is still being fetched.
3. The visual layout remains intact despite frequent data updates.
Keeping the above scenarios in mind, Playwright has the right answer, which is a mix of its automatic waiting feature, network interception, and ability to simulate user interaction in real-world conditions.
In the end, Playwright testing offers everything you need to build reliable tests. But before diving into writing tests, you must prepare your environment properly. Let's look at what you need to get started.
Getting started with the Playwright testing tool
Before you can unlock the full potential of Playwright testing, it’s essential to prepare your environment correctly. A solid foundation ensures you can write, execute, and maintain reliable tests without interruptions. Let’s go over what you need to get started.

Establishing requirements and setup
To use Playwright, have the following installed:
- Node.js (version 14 or higher). Make sure you have Node.js installed by running:
bash
node -v
- npm or yarn. These package managers will help install Playwright and other dependencies.
As to the Playwright testing tool itself, install it via npm with the command:
bash
npm install playwright
Or by using yarn:
bash
yarn add playwright
The command above downloads browser binaries. These include Chrome, Firefox, and WebKit. The command makes sure the tool is compatible across various platforms.
Important prerequisites. JavaScript/TypeScript and web development concepts to be familiar with
The Playwright testing tool works with JavaScript and TypeScript environments. That is why having a solid grasp of these languages is a must.
In addition, you need to have a foundation in the following five areas:
Area #1. JavaScript/TypeScript fundamentals
As mentioned before, Playwright tests are written using JavaScript or TypeScript.
Knowledge of async/await and TypeScript's type safety improves reliability and debugging.
Area #2. DOM manipulation
DOM is essential for interacting with web pages.
Familiarity with selectors (CSS, XPath) and methods like
page.click()andpage.locator()will be of great help.
Area #3. HTTP requests
Knowing how apps handle HTTP requests when testing API interactions.
Use
page.route()to intercept and mock network requests in different scenarios.
Area #4. Browser automation
Understanding how to control browsers (Chromium, Firefox, WebKit) in headless and headed modes.
Utilize browser contexts for parallel testing and handling multiple user scenarios.
Area #5. Modern frameworks (optional)
- Familiarity with React, Angular, or Vue is helpful if you’re testing SPAs or dynamic content.
Mastering these concepts will make your Playwright testing more effective and efficient.
NB: If you’re working with React, Angular, or Vue, knowing how they handle rendering and routing will also be beneficial.
To make the process of getting started with Playwright QA even smoother, consider these small tips:
Create reusable components and utilities that can be imported across multiple tests.
Use TypeScript for type safety and better debugging if your project supports it.
Regularly update your dependencies to avoid compatibility issues and gain access to new features.
Next, let’s walk through the process of setting up Playwright for successful E2E testing.
How to set up Playwright for E2E testing
Before writing your first Playwright test, you must set up the tool properly. These steps will ensure your testing framework is ready to handle real-world scenarios.
1. Installation
2. Configuration
3. Integration
Step 1. Install Playwright
If you haven’t already installed the tool, you can do that with a simple command. Start by initializing a new project:
bash
npm init -y
npm install playwright
The command sets up Playwright with default browsers. Test the installation by running a sample Playwright script.
Step 2: Configure Playwright for your project
Next, create a playwright.config.js file to customize settings:
javascript

module.exports = {
    use: {
        browserName: 'chromium',
        headless: true,
    },
};
Adjust different aspects:
browser type;
headless mode;
viewport size.
These suit your Playwright E2E needs.
Step 3. Integrate Playwright with your development environment
After you installed and configured Playwright, it is time to deal with integration. In Visual Studio Code, install the Playwright extension for IntelliSense and debugging support. Add a test script to package.json:
json

"scripts": {
    "test": "playwright test"
}
Use breakpoints and the Playwright inspector npx playwright codegen to debug tests efficiently.
Setting up Playwright testing optimizes your environment for writing, running, and debugging reliable tests. To make your workflow even smoother, follow these small steps:
Use TypeScript for better code clarity.
Use the Playwright Inspector npx playwright codegen for debugging tests.
Add meaningful test scripts to package.json to make execution faster.
Now, with your Playwright set up, it is time to write your first test.
Writing your first end-to-end test with Playwright
Here, we will guide you through the fundamental structure of a Playwright test. We will show how to create test cases for common scenarios and how to run and interpret test results. It is everything your team will need to build a reliable Playwright QA test suite.
The basic structure of a Playwright test
Here’s a simple Playwright example:
javascript

const { chromium } = require('playwright');

(async () => {
    const browser = await chromium.launch();
    const page = await browser.newPage();
    await page.goto('https://example.com');
    await page.click('a[href="/login"]');
    expect(await page.title()).toBe('Login');
    await browser.close();
})();
The Playwright script illustrated above does four things: launches a browser, navigates, interacts, and asserts the outcome.
Creating your first test case
First and foremost, test a login flow:
javascript

const { chromium } = require('playwright');

(async () => {
    const browser = await chromium.launch();
    const page = await browser.newPage();
    await page.goto('https://example.com/login');
    await page.fill('#username', 'user');
    await page.fill('#password', 'pass123');
    await page.click('button[type="submit"]');
    expect(await page.url()).toContain('/dashboard');
    await browser.close();
})();
Next, use CSS selectors or XPath to target elements.
Run Playwright test and interpret results
Run the Playwright test with:
bash
npx playwright test
Output indicates pass/fail status. If a test fails, please review logs or use Playwright’s trace viewer npx playwright show-trace to diagnose issues.
Once you get the basics, writing your first Playwright test is straightforward. To make your tests even better, consider doing these:
Use descriptive selectors (e.g.,
page.getByRole()) instead of relying solely on CSS or XPath.Modularize your tests by breaking them into smaller components.
Utilize Playwright’s trace viewer
npx playwright show-tracefor performance optimization.
When we’ve covered the basics, it is time to proceed to some advanced techniques. However, before going to the pro-Playwright testing section, make sure you fully understand the foundations we talked about above.
Advanced E2E testing techniques in Playwright
Playwright testing tools come with powerful features. These are great for
1. testing across multiple browsers;
2. handling authentication;
3. simulating network conditions;
4. performing visual regression testing;
5. dealing with test fixtures;
6. using screenshots and videos for debugging.
Let’s take a closer look at these techniques to make you a Playwright pro.
1. Test automation in multiple browsers
Run tests across browsers:
javascript

const { chromium, firefox, webkit } = require('playwright');

for (const browserType of [chromium, firefox, webkit]) {
    const browser = await browserType.launch();
    const page = await browser.newPage();
    await page.goto('https://example.com');
    console.log(await page.title());
    await browser.close();
}
2. Handling authentication and sessions
Reuse sessions by saving cookies:
javascript

await page.context().storageState({ path: 'state.json' });
Load them in future tests with:
javascript
const browser = await chromium.launch();
const context = await browser.newContext({ storageState: 'state.json' });
3. Network interception and mocking
Simulate server responses:
javascript

await page.route('**/api/data', route => route.fulfill({
    status: 200,
    body: JSON.stringify({ mock: 'data' }),
}));
4. Visual regression testing with Playwright
Capture and compare screenshots:
javascript

await page.screenshot({ path: 'screenshot.png' });
expect(await page.screenshot()).toMatchSnapshot('baseline.png');
5. Working with test fixtures
Set up reusable fixtures:
javascript

const { test } = require('@playwright/test');
test.use({ viewport: { width: 1280, height: 720 } });
6. Using screenshots and videos for debugging
Record videos:
javascript

const context = await browser.newContext({ recordVideo: { dir: 'videos/' } });
Adopting advanced techniques to your Playwright testing workflow is a way to improve test reliability and coverage. You can build a solid and scalable Playwright testing framework by applying the methods we mentioned above. It will meet the needs of complex, multifaceted web apps.
Best practices and common pitfalls in Playwright testing
To truly make the most of Playwright testing, there are some Playwright best practices to follow and common pitfalls to avoid.

Writing efficient and reliable E2E tests
Follow these Playwright best practices to get reliable E2E tests:
Use specific selectors. Playwright has built-in selectors like page.getByRole() or page.locator() for more reliable element targeting.
Avoid hard-coded waits. Rely on automatic waiting instead of fixed delays.
Modularize tests. Break tests into smaller, reusable components.
Implement retry logic. Use retry settings to reattempt failed tests, especially in scenarios factoring in network instability.
Utilize browser contexts. Isolate tests using separate browser contexts to avoid state contamination.
With these at your disposal, you will be good to go with Playwright.
Playwright and other testing tools. A comparison
When choosing an E2E testing tool, you need to understand the differences between Playwright and other popular options like Selenium and Cypress. While all three tools are designed for test automation, they have unique strengths and weaknesses that can impact your testing strategy.
Let’s break down the key differences.
Playwright vs. Selenium. Key differences and advantages
Speed
Faster execution with direct browser control. No WebDriver needed.
Uses WebDriver. Slower execution.
Automatic waiting
Built-in waiting mechanism. Handles actionable elements.
Handling via code. Requires explicit waits.
Browser support
Chrome, Firefox, Safari
Chrome, Firefox, Edge. Safari (via WebDriver)
API simplicity
Simple API. Designed for efficiency.
Older API. Less efficient.
Debugging tools
Built-in Inspector and Trace Viewer.
No built-in debugging tools. Relies on browser developer instruments.
Integration
Jest, Mocha, Jasmine, and alike.
Needs additional setup for integrations.
Headless testing
Native headless and headed modes.
Headless mode with extra configuration.
Playwright vs. Selenium. Best use cases
Selenium testing framework remains a powerful tool for projects requiring broad compatibility across browsers and legacy systems. It’s particularly useful when:
Your testing needs involve older browsers or devices not fully supported by Playwright.
You have existing, established Selenium test suites that would require significant effort to migrate.
Your application requires integration testing involving browser automation across various environments.
Playwright, on the other hand, is ideal when:
Speed and efficiency are critical, especially when running large test suites in headless mode.
With consistent API testing, you must automate testing across modern browsers (Chromium, Firefox, WebKit).
You build applications using modern JavaScript frameworks (React, Angular, Vue) and need a streamlined testing approach.
Playwright vs. Cypress. Which is best for your needs?
Performance
Faster execution. Efficient browser control.
Slightly slower. Relies on browser APIs.
Browser support
Chrome, Firefox, Safari
Chrome, Edge
API design
Flexible API. Built for complex use cases.
Developer-friendly API. Lacks flexibility in multi-browser testing.
Debugging tools
Built-in Inspector and Trace Viewer.
Built-in test runner.
Integration
Jest, Mocha, Jasmine, and alike.
JavaScript testing frameworks.
Testing score
Ideas for E2E and UI testing
Primary focus on frontend testing
Playwright vs. Cypress. Best use cases
Cypress excels at providing a smooth developer experience for front-end testing and is highly effective when:
You are building purely front-end applications (e.g., SPAs) targeting only Chromium-based browsers.
Quick feedback loops are essential; you prefer interactive debugging with a real-time test runner.
You need robust network mocking and stubbing tools for UI-centric tests.
Playwright, on the other hand, is the better choice when:
Your application must work seamlessly across multiple browsers (Chromium, Firefox, WebKit).
You must test complex user interactions, including handling authentication, file uploads, and WebSockets.
Your tests require headless execution for CI/CD integration and performance optimization.
Selecting between Playwright, Selenium, and Cypress is a tough choice to make. Each one has something unique to offer. In the end, these are the best usages for each tool:
Selenium is an excellent choice for multi-browser compatibility testing.
Cypress is best for frontend testing within the Chromium browser environment.
Playwright is a good fit for projects with cross-browser compatibility, complex workflow automation, and robust testing.
Conclusion
Playwright is a fast, flexible, and developer-friendly solution for end-to-end testing. With native cross-browser support, built-in auto-waiting, and advanced debugging, it helps address key pain points in web testing, from dynamic content to flaky tests. The tool is beneficial when you build complex SPAs or run large test suites in CI/CD pipelines.
Besides, when choosing between different Playwright-alike tools, we compared it to Selenium and Cypress, considering
how complex your web app is;
what type of browser environment you working with;
what particular testing features you prefer.
The key takeaway? Playwright excels in cross-browser compatibility, automation of dynamic content, and integration with modern JavaScript frameworks. Its built-in tools for automatic waiting, debugging, and performance optimization are great for building reliable E2E tests.
Don’t have time to start with Playwright from scratch? Benefit from the team of experienced Playwright QA engineers from DeviQA. We are a trusted name in software testing services.
